Article by Delbert Leisure, Jr, Anderson, Indiana
Part I
Did you ever just want to build a model and had nothing to go by? I would like a big FW200 Condor, but there are no kits out there. Let me say first, that you have to know what you want in detail. You have to know what features
that you want and what the final project will be like even before you start.
If your not sure, do it as you go, you will complete it later, then your in trouble if your start designing your own...
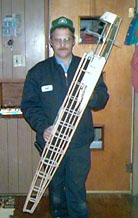
I wanted a Twin, Axis plane, Fairly good size,
easy to transport, all wood, with Retracts or Fixed Gear, flaps, Operational
Bomb bays, Semi detailed cockpit, simple to fly, Giant Scale (over
80 in), I didn't want much huuuuh?.
I started to dig through the 3 views looking
at which type of plane I was planning to build. I selected the JU88A-4 version. I liked the Emblem of
KG3, and the plane had to have a DL on it. So the selected plane was a JU88A-4 of KG3, "5K+DL".
Now I knew what I wanted, and had to do research to see if the did or didn't exist. If so, find out what information was available on the plane. Luckily the plane did exist but was missing in Action around the Stalingrad area.
Ju 88A-4 WNr.2241.
Ernst, Oblt. Walter, 3./KG 3 gelb D 5K+DL 03-Jan-43
MIA with crew due to Flak. Ru§land Gen.Qu.6.Abt.
(mfm #8)-Vol.13 (Tschertkowo)
100% Loss , Oblt. Walter Ernst, born 12.05.1919 Vienna/Austria.
Still listed as missing.
That's all the information I had, the plane was real,
nothing more to go by.
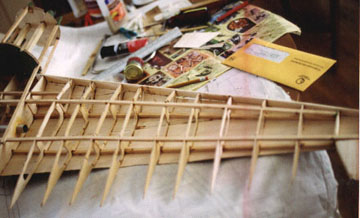
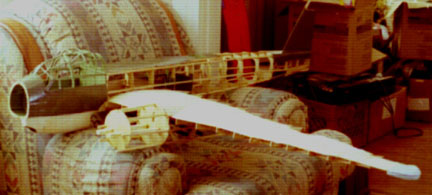
First step, I got myself a 3 view of a Ju88 in 1/48 scale
and reproduced it in 1/8 scale on freezer paper roll. Transferring each line, enlarging it, and drawing it to fit the 1/8 scale view. I drew the top, bottom, front, rear, and each wing panel top and bottom. Pain staking venture, but after about a year of drawing, redrawing, checking, and rechecking the sizes and lines, I was happy
with it. It looked real good on paper.
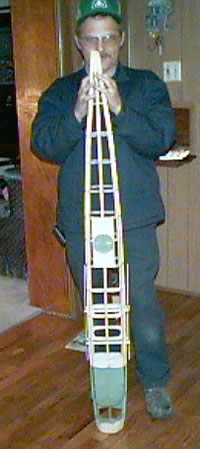
Frame up the Canopy with 1/4X1/4 Sticks, add the Gondola, add the rudder, and it looks like a plane. I used 10 Ga wire on the upper Canopy section with the
insulation on it to get the curved framework. Well it has the outline of something. Add the beetle nose frame work and paint the interior "02".
|
|
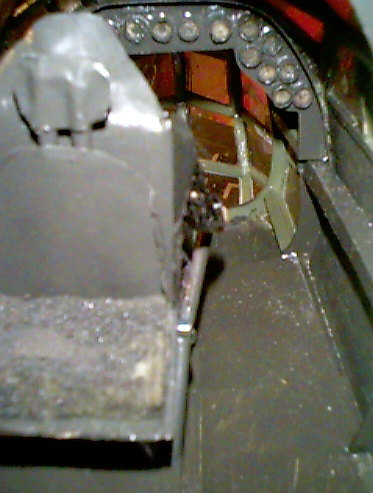
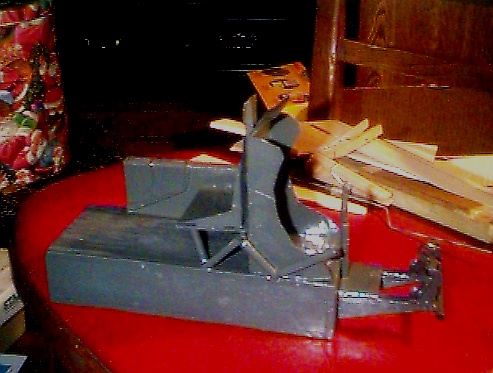
When I get bored or waiting for the glue to dry I painted and built the cockpit seats and interior. The big box the seats set on is a compartment for the batteries which it hold 5 "C" Cells at 2500 Ma at 6 volt.
Oooooooooooops, "02" wrong color for interior of cockpit,
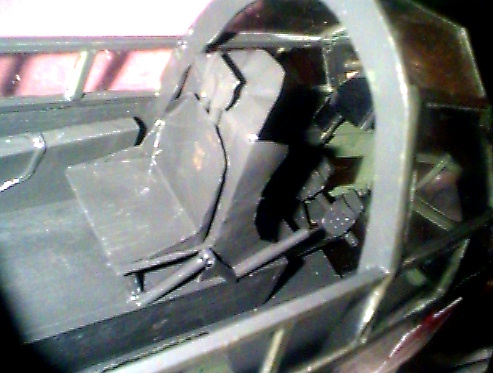
repainted it "66" to match the seats. Installed the cockpit interior and the upper
glass flat panels. All the glass panels are flat.
Some of the panels were heated to get a slight curve
on them. Instrument panel was 1/8 in plastic tubes cut off and filled with Epoxy on a black panel. Yep, there a pilot in the front seat, one hand on a stick, the other is on the seat adjuster lever.
|